
Engineering lesson 12: Cameras and video streaming systems
Overview of the content
This lesson includes an overview and discussion of Raspberry Pi and the camera system.
NOTE: This lesson is quite technical in nature and will be most useful once you have received your team’s camera equipment. Until then, you can use it as a preview of the work you will do once this equipment is in hand.
See also Lesson 8 which has downloadable instruction manuals for the Raspberry Pi video system and the Ubiquiti Radio config files
NEBP Tech Session: Video streaming with Raspberry Pi (February 2024) |
|
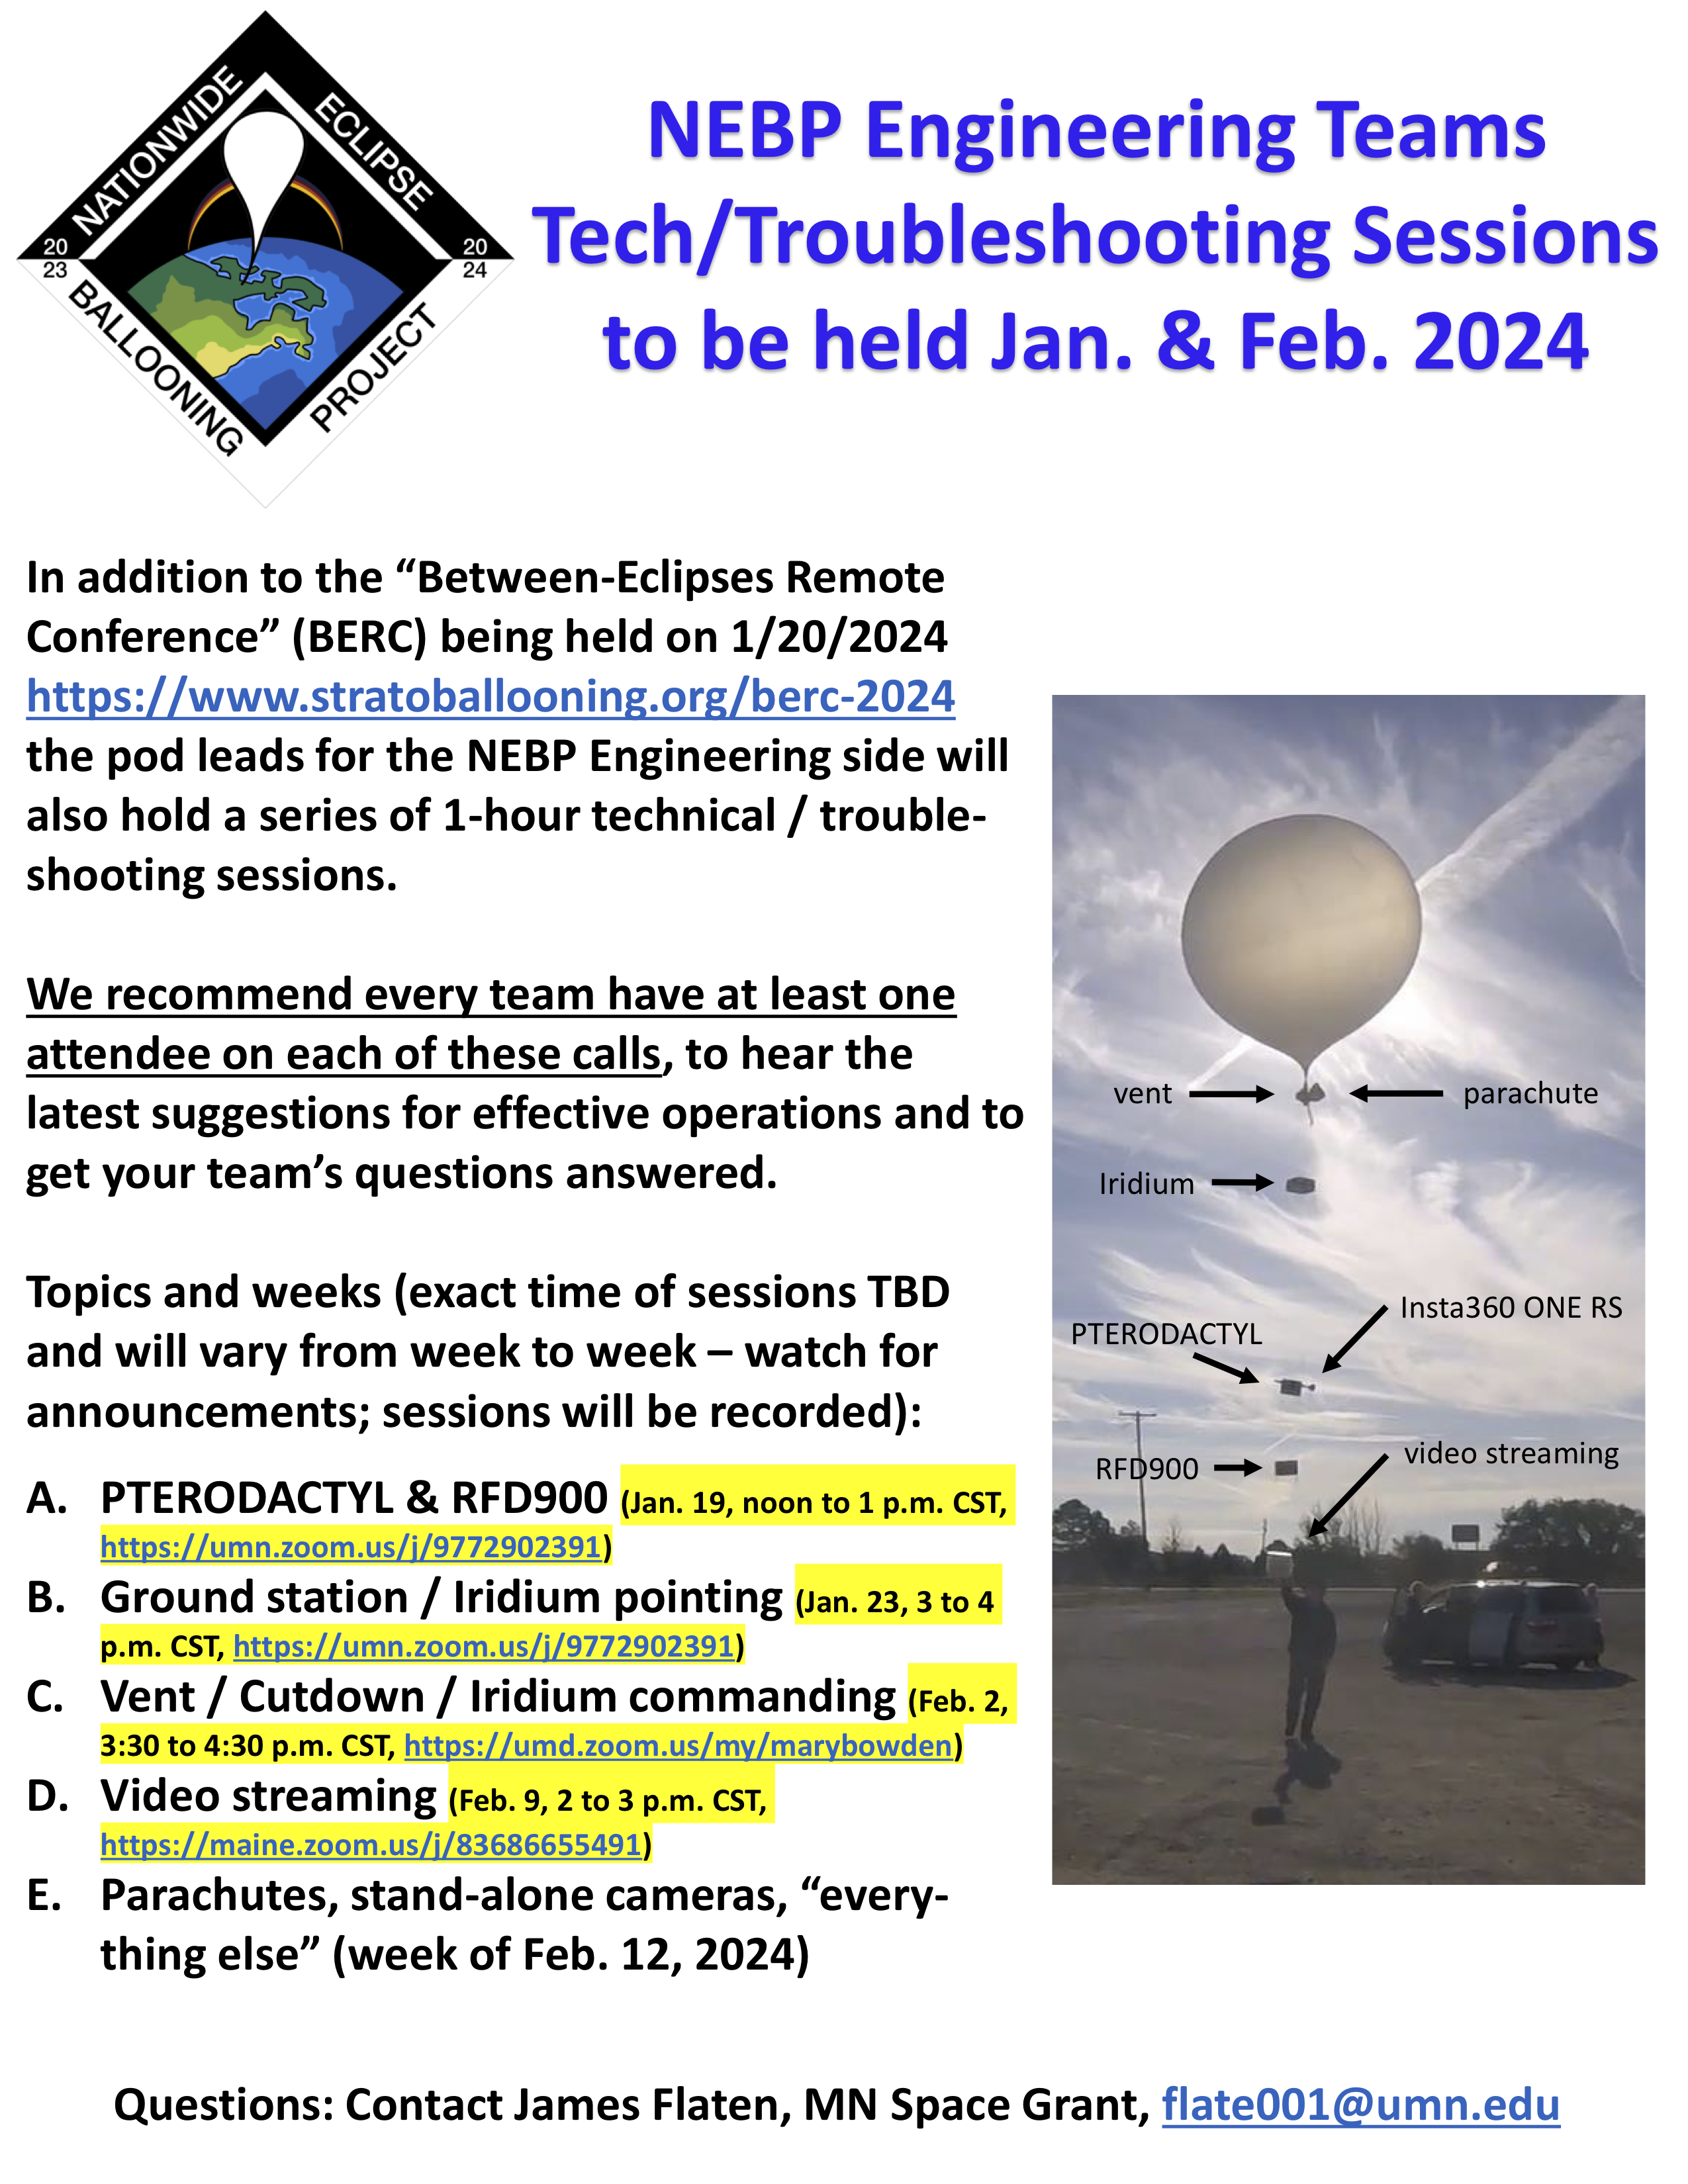 |
This National Eclipse Ballooning Project (NEBP) tech / troubleshooting session was recorded by the University of Maine team on Feb. 9, 2024 and gives useful information on video streaming with Raspberry Pi. (Click on flyer image for larger version with all dates and topics) |
NEBP Tech Session: Parachutes, stand-alone cameras and more (February 2024) |
|
|
This National Eclipse Ballooning Project (NEBP) tech / troubleshooting session was recorded on Feb. 16, 2024 and gives useful information on parachutes, stand-alone cameras and more. (Click on flyer image for larger version with all dates and topics) |
Learning objectives
After completing this lesson, students will be able to:
- Setup and operate Raspberry Pi and the Camera System
Contents
- Insta360 camera and extra battery
- NEW 9/18/23: Files for 3D printing a case
- Raspberry Pi
- NEW 9/21/23: Files for Boxes forPi camera and RFD 900 data logger
- payload instructions
- camera system
- tips for improving photography on flights
-
NEW 9/14/23: Installing and Configuring OBS to Stream Pi Cam Video to YouTube
3D printed case for Insta 360 camera and extra battery
- Download the four files from our NEBP Google Drive - zipped
- Download the files - unzipped in a folder
Raspberry Pi ArduCam System instructions
NEW 9/21/23: Download the files for boxes
- Box for Pi Camera (zipped folder; download from our NEBP Google Drive)
- Box for RFD900 Iridium data logger (zipped folder; download from our NEBP Google Drive)
ArduCam System Build and Instruction Manual by Noah Netz, MSU BOREALIS team. [Download from NEBP Google Drive; posted 6/28/23]
Notes and prerequisites:
- Older tutorials for the Raspberry Pi had to have the SD card reimaged. This is no longer the case.
- Ensure that the ground plate has been modified.
- Ensure that the Ubiquiti radio is programmed.
See also updated ArduCam System Instruction Manual posted 6/7/23. Originally created by Chris Long and Tristan Sampley, edited by Noah Netz.
Raspberry Pi and ArduCam Ground Plane Modification Instructions. Created by Noah Netz, MSGC BOREALIS at Montana State University. Posted 6/7/23
- This file includes an additional download link to the template for the Pi Ground Plane, which can also be downloaded here. Posted 6/7/23
All three instruction manuals and the template are downloadable from the NEBP Google Drive.
Tips for improving photography on balloon flights
This presentation and accompanying slide deck offers additional information on improving photography on your balloon flights, including things that could go wrong, recommendations for stabilizing the camera, and camera suggestions.
Tips for Standalone Video Photography on Stratospheric Balloon Flights - by Dr. James Flaten, Minnesota Space Grant Consortium. [YouTube video, 34:10, closed captioned]
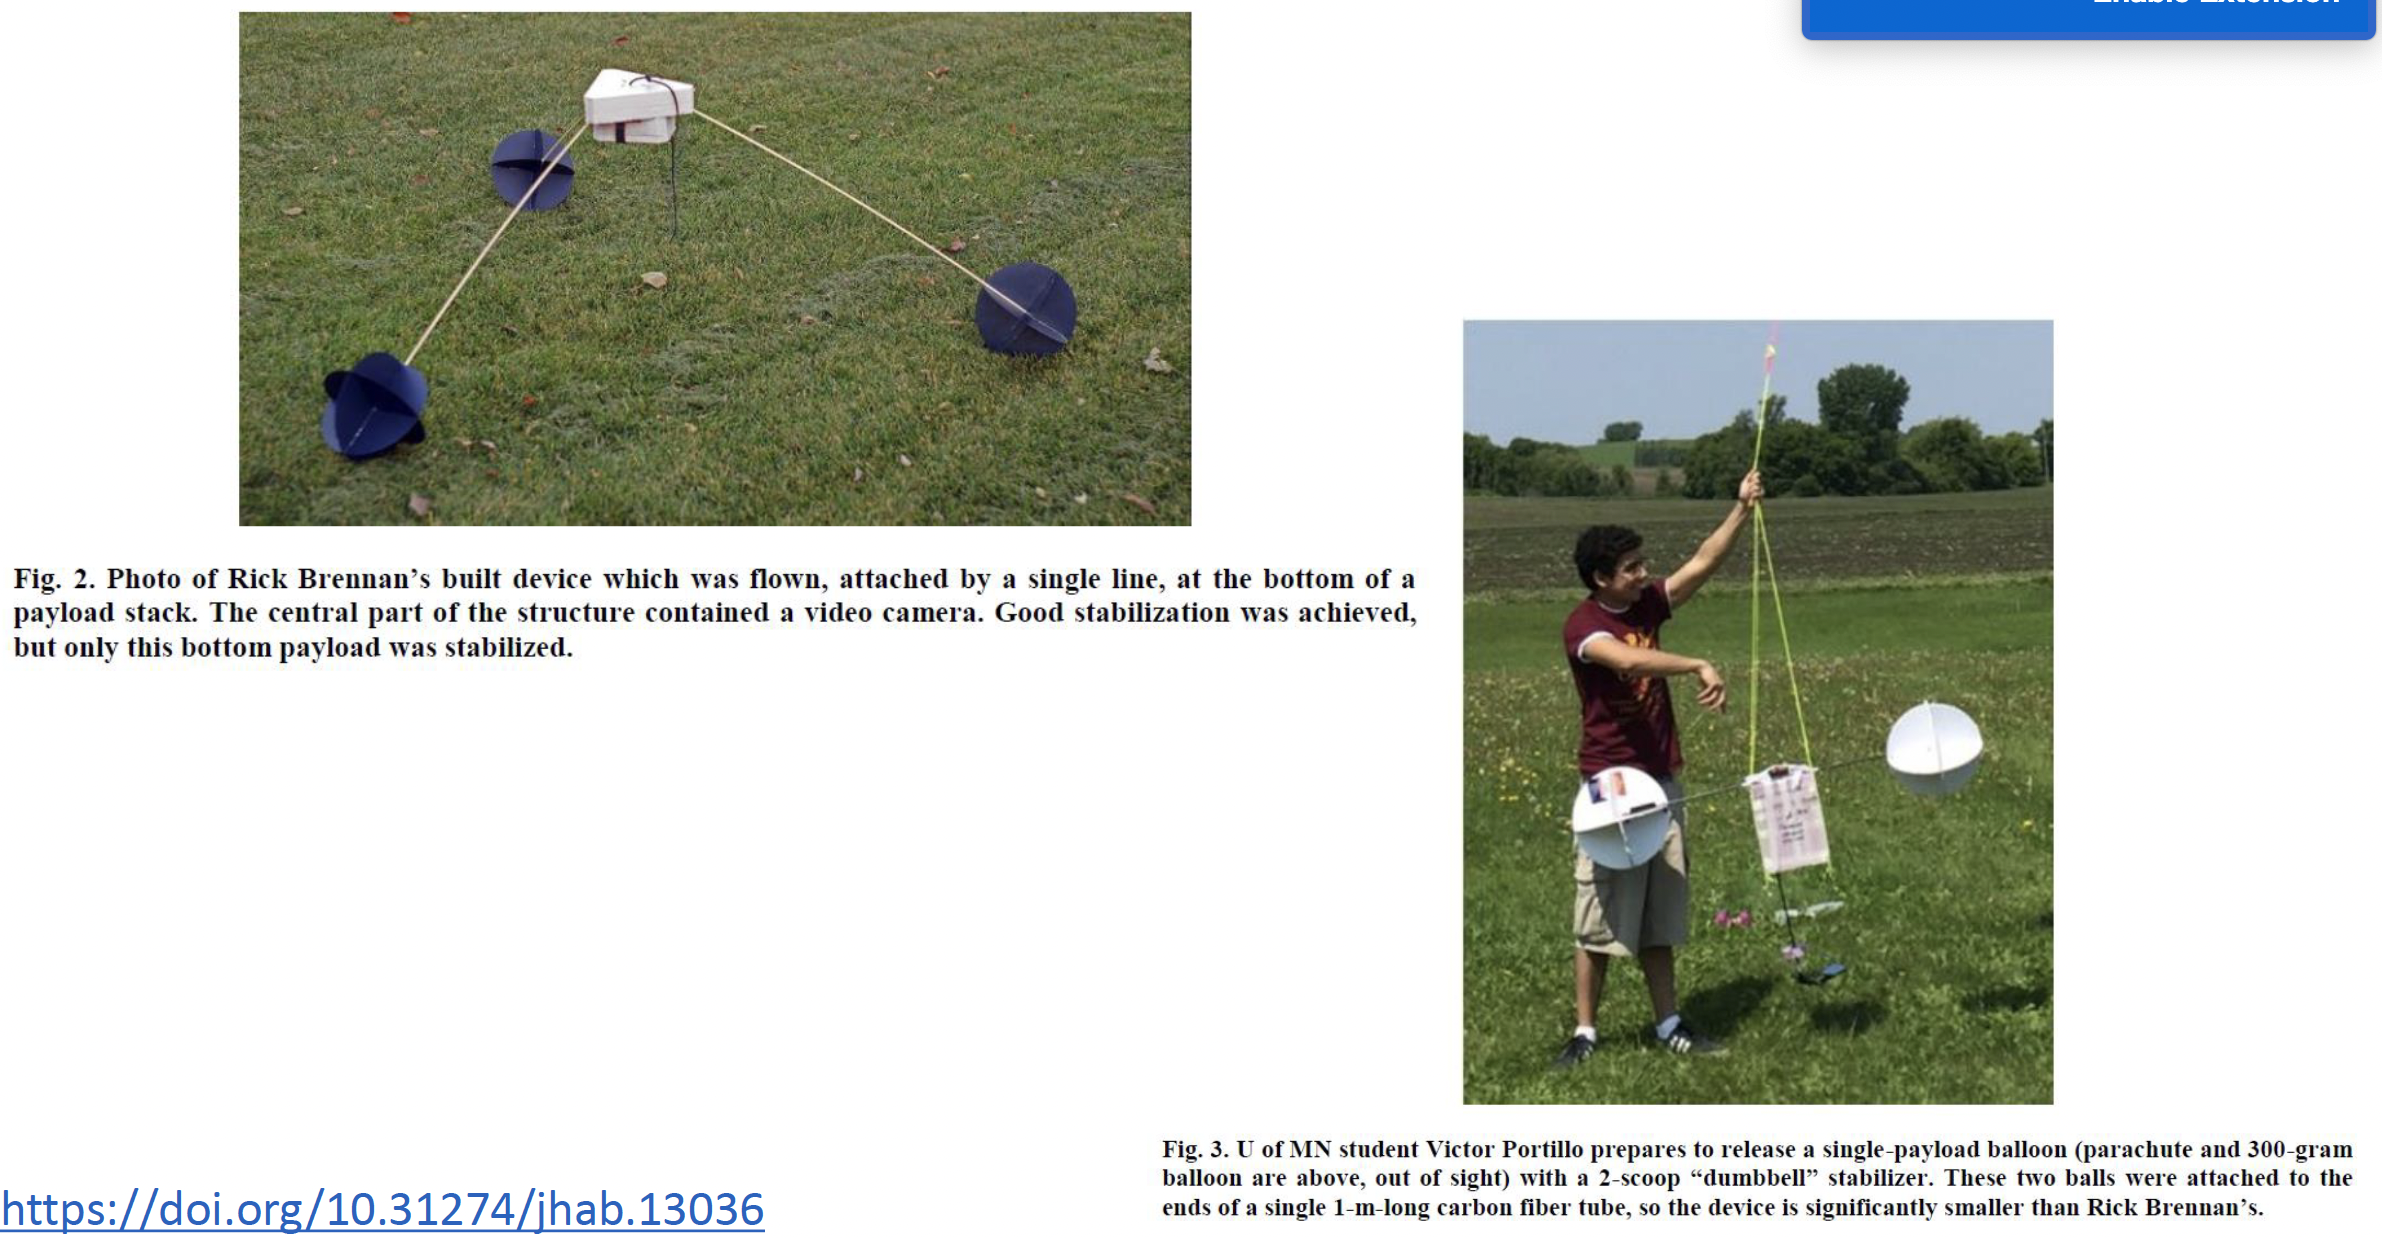
Download the related slide deck here -- the video mentions slides 14-18 and slide 11. [NEBP Google Drive]
Installing and Configuring Open Broadcaster Software (OBS) to Stream Pi Cam Video to YouTube
NEW 9/14/23: This guide by Noah Netz, MSU BOREALIS team, will walk you through the process of using OBS (Open Broadcaster Software) to stream video from a Raspberry Pi camera (Pi Cam) to YouTube. Download from the NEBP Google Drive.
![]() Don't forget to track today's progress in your portfolio
Don't forget to track today's progress in your portfolio
Will you take a few minutes to give us some feedback on this lesson? Thank you!
Course home page // Next lesson >>